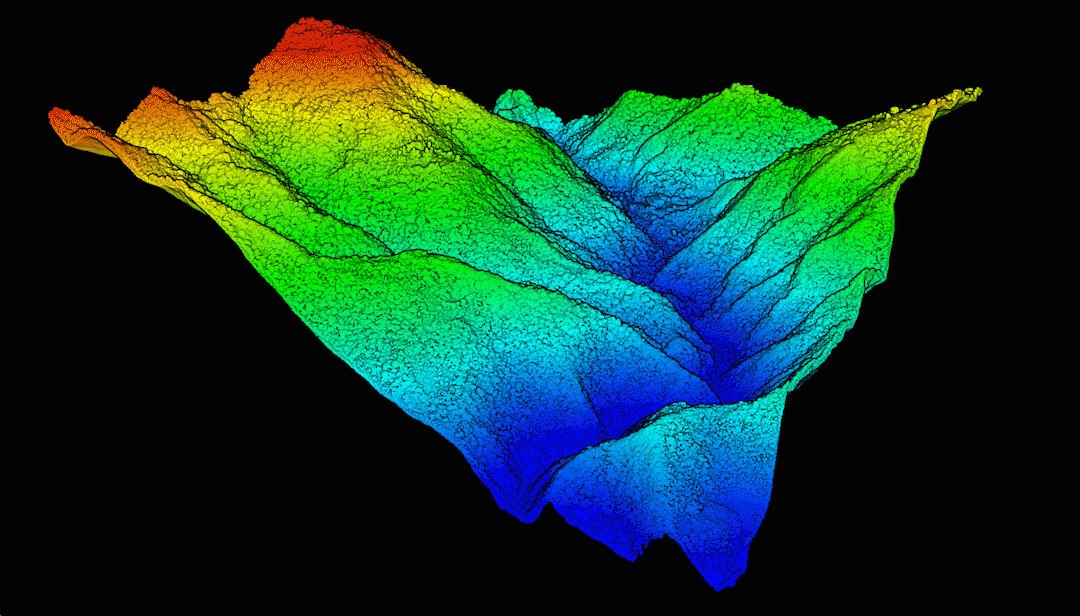
Drone mapping guide

Drone mapping, from flight plan to survey-grade deliverable

Drone mapping is how Midsouth Drone Services got its start, and it is still what we fly most. This guide covers where the technology came from, when a job needs photogrammetry and when it needs LiDAR, how to fly each one, and how Emlid GNSS ties it all to real coordinates, with or without internet on site.

  • Photogrammetry or LiDAR: which one the job needs
  • Flight patterns for 2D maps and 3D models
  • RTK for any RTK drone from an Emlid base
  • A field workflow, from control to landing
Contour lines generated from a drone survey
Not new technology

Photogrammetry is older than the airplane.

Measuring the ground from photographs goes back more than 160 years. Drones did not invent mapping. They made it something one crew can fly in an afternoon.

  1. 1849 Laussedat starts measuring from views

    French army officer Aimé Laussedat, often called the father of photogrammetry, maps terrain from perspective views, and from photographs by 1861.

  2. 1858 The first aerial photograph

    Nadar photographs the ground from a tethered balloon outside Paris, 45 years before the first airplane flight.

  3. 1867 The word "photogrammetry"

    Albrecht Meydenbauer, who measured buildings from photographs, puts the word in print in Berlin.

  4. 1915 Aerial photos become maps

    In World War I, overlapping aerial photos are pieced together into trench maps.

  5. 1930s Mapping a whole valley

    The USGS and the Tennessee Valley Authority map the region from aerial photos with stereo plotting instruments, the first full-scale test of the method.

  6. 1957 Computers join in

    Uki Helava's analytical plotter uses a computer to solve the geometry. A prototype is built in 1963.

  7. 1990s Film goes digital

    Softcopy workstations replace film and mechanical plotters.

  8. Today Structure from motion meets the drone

    Software matches thousands of overlapping photos automatically, and an RTK drone collects them in one flight.

Dates from ISPRS, the USGS and The Canadian Encyclopedia.

Two ways to map from the air

Photogrammetry or LiDAR? It depends on what you have to deliver.

Drone mapping includes both. Photogrammetry builds the map from overlapping photos, and LiDAR measures the ground with laser pulses. The quality of what you deliver comes down to the method you choose and how well you collect the data.

Photogrammetry
Photos → maps and models

Photogrammetry

The drone takes hundreds of overlapping photos. Software matches the same features across them, works out where each photo was taken, and builds a point cloud, a 3D mesh and an orthomosaic, with real color in every pixel.

Best at
  • Orthomosaic maps
  • Photo-real 3D models and meshes
  • Stockpile volumes
  • Surfaces and contours on open ground
Watch out for
  • It maps only what the camera sees. Under trees and tall grass it measures the top of the vegetation, not the ground.
  • Water, snow and glass match poorly.
LiDAR
Laser pulses → the ground surface

LiDAR

A laser scanner fires hundreds of thousands of pulses a second. One pulse can return several times, from leaves, branches and the ground below, so the scanner finds the ground through gaps in the canopy.

Best at
  • Surfaces and contours under vegetation
  • Ground-classified point clouds
  • Power lines, corridors and forestry
  • Day or night: the laser needs no sunlight
Watch out for
  • Not the tool for photo-real 3D models. Those are photogrammetry.
  • In low light or darkness the point cloud has no color. If you only need ground points, that doesn't matter.
  • Very dense canopy still leaves gaps: fly lower and slower, with more overlap.

Which method for which deliverable

You needPhotogrammetryLiDARWhy
2D orthomosaic mapBest choicePossibleA LiDAR payload's camera can make one, but a mapping camera does it better.
Photo-real 3D modelBest choiceNot suitedWe build every 3D model with photogrammetry. A full-frame camera such as the DJI P1 gives the highest quality.
Stockpile volumesBest choiceWorks wellPhotogrammetry alone does this easily. LiDAR is not needed.
Surface and contours, open groundWorks wellWorks wellBoth work when the camera can see the ground.
Surface and contours under vegetationNot suitedBest choicePhotos map the top of the grass and trees. LiDAR finds the ground beneath them.
Ground-classified point cloudPossibleBest choicePhotogrammetry points stop at the first surface the camera sees.
Power lines and wiresNot suitedBest choiceThin wires rarely survive photo matching. The laser hits them.
Either way, survey-grade accuracy comes from GNSS on the ground, not from the drone alone. See how that works →
How you fly decides what you get

The flight pattern matters as much as the drone.

A simple lawnmower grid makes a good 2D orthomosaic. It rarely makes a good 3D model, because a camera pointing straight down sees only the tops of things. Choose the pattern for the deliverable.

Single grid (lawnmower)

Orthomosaics, stockpiles, open-ground surfaces

Parallel lines with the camera pointing straight down. Fast and efficient. Plan at least 75% front and 60% side overlap.

Crosshatch, angled camera

3D models, buildings, anything with sides

Fly the area twice, the second grid turned 90°, with the camera tilted off vertical so it sees the faces of buildings, walls and piles. Roughly doubles flight time.

Orbits

Towers, single buildings, facades

Circle the subject with the camera aimed at it, then again at other heights and camera angles. Fills in the sides a grid cannot see.

LiDAR strips

Surfaces and contours under vegetation

Wider-spaced lines whose scan swaths overlap 30–60%, depending on the sensor and the ground. Over vegetation, fly slower with more overlap: more pulses per square foot is what finds the ground.

Mission settings at a glance

Starting points, not rules. Your camera, sensor and site set the final numbers.

Setting2D map3D modelLiDAR
Flight patternSingle gridCrosshatch, plus orbits where neededSingle grid; crosshatch under heavy canopy
Camera angleStraight downTilted off verticalStraight down
Overlap75%+ front, 60%+ side75%+ front, 60%+ side, both grids30–60% side; 30% can do on bare earth
AltitudeSet by the detail you need (GSD)Low enough for the detail you need200–250 ft AGL in general
SpeedSlow enough for sharp photosSlow enough for sharp photos12–20 mph; up to 20 mph on bare earth
Sensor settingsMechanical shutter if you have oneMechanical shutter if you have one2–5 returns, IMU calibration on (DJI L2)
Ground checksGround control and check points by acreageGround control and check points by acreageTargets by acreage, plus topo check shots
What we flyDJI Mavic 3E, Matrice 4EMatrice 400 with the P1 for the highest qualityMatrice 400 with the L2
Survey-grade means GNSS

Accuracy comes from the ground, not just the drone.

For stockpile volumes or a good-looking map, a drone on its own can be enough. A survey-grade deliverable with survey-grade georeferencing needs GNSS equipment in the workflow: a base on known control sending corrections to the drone, and a rover to shoot control, targets and check shots. That is where Emlid Reach receivers come in, and why you see them on so many drone mapping jobs.

  • Base and rover (what we recommend): the base sits on control and corrects both the rover and the drone
  • One receiver on a budget: run it on a network RTK service such as Emlid Corrections, free for a year with every Reach
  • One receiver on a site with at least 4 existing control points: localize to that control
  • The same Emlid base works with any RTK drone that accepts NTRIP corrections
Two Emlid Reach RS4 receivers set up as a base and rover
RTK for the drone

Your Emlid base can feed any RTK drone, with or without internet.

An RTK drone needs a steady stream of corrections. An Emlid Reach base on your control point sends them to the drone the same way it sends them to your rover, so the base, the rover and the drone all work from the same control. It is not only for DJI: any RTK drone that accepts NTRIP corrections can use it.

With internet

Emlid Caster (NTRIP)

  1. Emlid baseon your control point, SIM installed
  2. Emlid Casterfree NTRIP service in the cloud
  3. Controlleron a hotspot with internet
  4. DroneRTK FIX

The base sends corrections to the free Emlid Caster over its own cellular connection. The drone controller logs in as a rover with the Caster's host, port, mountpoint, username and password (Custom Network RTK on DJI). Your Emlid rover uses the same base.

  • A data SIM in the base
  • Internet on the controller for the whole flight
  • The rover login typed exactly: every character is case-sensitive

If the hotspot drops mid-flight, the drone loses RTK. Keep the base logging so you can post-process (PPK) if it happens.

No internet

Local NTRIP from the base

  1. Emlid baseLocal NTRIP on in Emlid Flow
  2. Wi-Ficontroller and base on the same network
  3. Controllerstays close to the base
  4. DroneRTK FIX, no cell signal needed

No cell service on site? Turn on Local NTRIP in Emlid Flow. The base serves corrections itself over Wi-Fi, and the controller connects to it like any NTRIP caster, using the login Emlid Flow shows you. The drone flies with full RTK accuracy.

  • A Reach RS4, RS4 Pro, RS3 or RS2+ as the base
  • A controller that can join Wi-Fi
  • The controller in Wi-Fi range of the base for the whole flight

The one rule: stay close to the base. The controller has to hold its Wi-Fi link to the base, or the drone stops getting corrections.

Step-by-step Emlid Caster guide → Emlid documents both setups for DJI and Autel RTK drones. Details at docs.emlid.com.

Field workflow

A drone mapping mission, step by step.

The order we work in, from control to landing. It is the same for photogrammetry and LiDAR; where they differ, the step says so. Processing is not covered here.

Before you goCoordinates and control
1

Know your coordinate system

Know the horizontal and vertical system before you touch a receiver. Most US work is State Plane on NAD83(2011) in US survey feet, with NAVD88 elevations from GEOID18. If someone gave you control, confirm which system it is in.

Elevations off by about 95 to 100 ft in the Mid-South? You are looking at ellipsoid heights, not NAVD88 elevations.

2

Decide on control

Existing control provided (preferred): get the points as a CSV and import them into your Emlid Flow project. No existing control set: set your own point, a rebar or nail, and measure it with an RTK service such as Emlid Corrections. One Emlid receiver and at least 4 existing control points: localize to that control. How to localize →

Localizing takes a minimum of 4 existing control points, spread around the site and not in a straight line.

3

Verify the rod, the vial and the antenna height

Measure the rod: a 2 m rod should be 2.000 m to the bottom of the receiver. Turn on the quick-release option in Emlid Flow and let it add the adapter and the phase center. Never add them yourself. Make sure the rod's level vial is calibrated: every control shot depends on it.

Check: A wrong antenna height shifts every elevation you collect.

Set up on siteBase and ground control
4

Set up the base

Base and rover, with existing control: set the base up on one of the existing control points. In the base settings choose Manual, then From project, and assign the point you imported from the CSV that the base is physically sitting on.

One receiver, with at least 4 existing control points: localize first. Then set any extra control you want and survey your ground control points (targets). When you are done, set that same receiver up as the base for the drone flight, over a point you surveyed after the localization, and in the base settings assign that point as the base point.

Either way, turn on Autostart logging so the base always records a raw log.

Set the base settings correctly every time. If the base is assigned the wrong point, everything the rover and drone collect shifts by the difference. It can be fixed, but it is a headache.

5

Place and shoot ground control and check points

Spread targets around the perimeter and through the interior of the site, in the open, with a stake at the center of each one. Put some check points where there is ground cover, not only in the easy open spots. Shoot each one with the rover for 30 seconds or more, tilt compensation off, the rod leveled using its level vial.

How many check points? Georgia's surveying board rule for drone LiDAR and camera surveys (Rule 180-7-.04) sets the minimum by project size:

  • 1 to 10 acres: at least 4
  • 10 to 25 acres: at least 8
  • 25 to 100 acres: at least 12
  • 100 to 200 acres: at least 24
  • 300 acres or more: at least 36

The rule lists no figure for 200 to 300 acres. It sets no fixed number of ground control points for drone work: use enough, along the flight lines, to hold the whole site in 3D. Check points are measured independently and are never used to adjust the data.

Going for the best? ASPRS calls for at least 30 check points to fully test a map's accuracy. See the standards →

PhotogrammetryHigh-contrast targets for both ground control and check points.

LiDARBlack-and-white targets that reflect strongly to the laser. Set them on level ground: they check and adjust the vertical.

Check: Before you shoot, make sure the rod's level vial is calibrated.

6

Take check shots

Quick topo shots, tilt compensation on, 5 to 10 seconds each. Shoot slopes and embankments to prove your contours.

LiDARShoot inside tall grass and weeds too. It is the best proof that the LiDAR found the true ground.

FlyConnect the drone to your base just before you fly
7

Connect the drone to your Emlid base

Do this after the targets are placed and surveyed, just before you fly, whether you run a base and rover or a single receiver as the base. With internet, set the base output to the Emlid Caster with the base login, check that caster.emlid.com shows the base Online, then connect the controller with the rover login. With no internet, use Local NTRIP. Step-by-step Emlid Caster guide →

Check: The drone shows RTK FIX before takeoff.

New users often swap the logins, or use the same login for both the base and the rover. The base credentials go in the base. The SAME rover credentials go in your GNSS rover and in the drone controller.

8

Plan the mission

Choose the pattern for the deliverable (see above). A complete dataset beats a fast flight. A reflight costs more than a few extra batteries.

PhotogrammetrySingle grid for maps. Crosshatch with an angled camera, plus orbits, for 3D models.

LiDARDepends heavily on your sensor and the ground. In general: 200–250 ft AGL, 12–20 mph, 30–60% side overlap, 2–5 returns, IMU calibration on (DJI L2). Bare earth can fly at 30% overlap and 20 mph with good results.

9

Fly it

Take off only with an RTK FIX and watch it for the whole flight. Swap batteries as the mission needs them and resume.

Check: If RTK drops, the base log lets you post-process (PPK) the flight.

Before you leaveProve the data, keep the backup
10

Check the targets

Stake out each target in Emlid Flow before you pick it up. A large difference means a bad shot, so reshoot it. Leave the stakes in the ground for next time.

11

Save the base log

Download the base's RINEX log and keep it with the project. It is your PPK backup, and you can submit it to NOAA's OPUS for an independent position on your base point. 30 minutes of data is enough for most work.

Questions on a step? Call (901) 444-0804. We fly this workflow ourselves.

The standards: Georgia's rule is the working minimum, ASPRS is the best.

GEORGIA RULE 180-7-.04

Check points by acreage

Drone LiDAR or camera surveys: at least 4 check points on 1 to 10 acres, 8 on 10 to 25, 12 on 25 to 100, 24 on 100 to 200 and 36 on 300 or more. Some in the interior and under ground cover, measured independently of the survey.

ASPRS 2024

30 check points to prove accuracy

The ASPRS Positional Accuracy Standards (Edition 2, Version 2) require at least 30 check points for a fully compliant accuracy test, up to 120 on large projects.

ASPRS 2024

Check points twice as accurate

Your control and check points must be at least two times more accurate than the map you are testing, and their own survey error counts in the final accuracy.

ASPRS 2024

Bare ground passes or fails

Accuracy on open, non-vegetated ground must meet the spec. Accuracy under vegetation is reported, not pass or fail. Results are stated as RMSE; the old 95% confidence figure is gone.

Drone mapping questions we get

Do I need LiDAR?

Only if you need the ground under vegetation: surfaces and contours where trees, brush or tall grass cover the site, or a ground-classified point cloud. Orthomosaics, 3D models and stockpile volumes are photogrammetry jobs.

Why is my 3D model poor when my map looks great?

A single grid with the camera pointing straight down sees the tops of things, not their sides. For a 3D model, fly a crosshatch with the camera tilted, and add orbits around buildings and structures.

Do Emlid receivers only work with DJI drones?

No. An Emlid base sends standard NTRIP corrections, through the Emlid Caster or by Local NTRIP, so any RTK drone that accepts NTRIP corrections can use it. Emlid documents DJI and Autel setups.

There is no cell service on my site. Can I still fly RTK?

Yes. Turn on Local NTRIP on the base and connect the controller to the same Wi-Fi network. Stay close to the base so the controller keeps that Wi-Fi link for the whole flight.

Base and rover, or one receiver?

We recommend a base and rover. On a budget, one receiver on a network RTK service gets you working. On a site with at least 4 existing control points, localize to them.

Can you help me plan a job?

Yes. Call (901) 444-0804 and tell us the site and the deliverable. We will tell you what to fly and what to bring.

Planning a mapping job?

Tell us the site and the deliverable, and we will tell you what to fly and what to bring.